
Imagine the scent of rendered schmaltz and woody rosemary wafting through your kitchen as the skin on your bird transforms into a sheet of amber glass. There is a primal, soul-deep satisfaction in mastering full chicken recipes oven techniques that separate a soggy Tuesday dinner from a culinary triumph. We are chasing that elusive combination of velvet-soft breast meat and legs that pull away from the bone with the slightest tug of your tongs. Achieving this requires more than just a timer; it demands an understanding of thermal dynamics and protein structures. Most home cooks treat roasting as a passive act, but we are going to approach it with the precision of a laboratory experiment and the heart of a Sunday feast. By the time we pull that heavy-bottomed roasting pan out of the heat, you will not just have a meal; you will have a masterpiece. Let's dive into the mechanics of the perfect roast.
The Gathers:
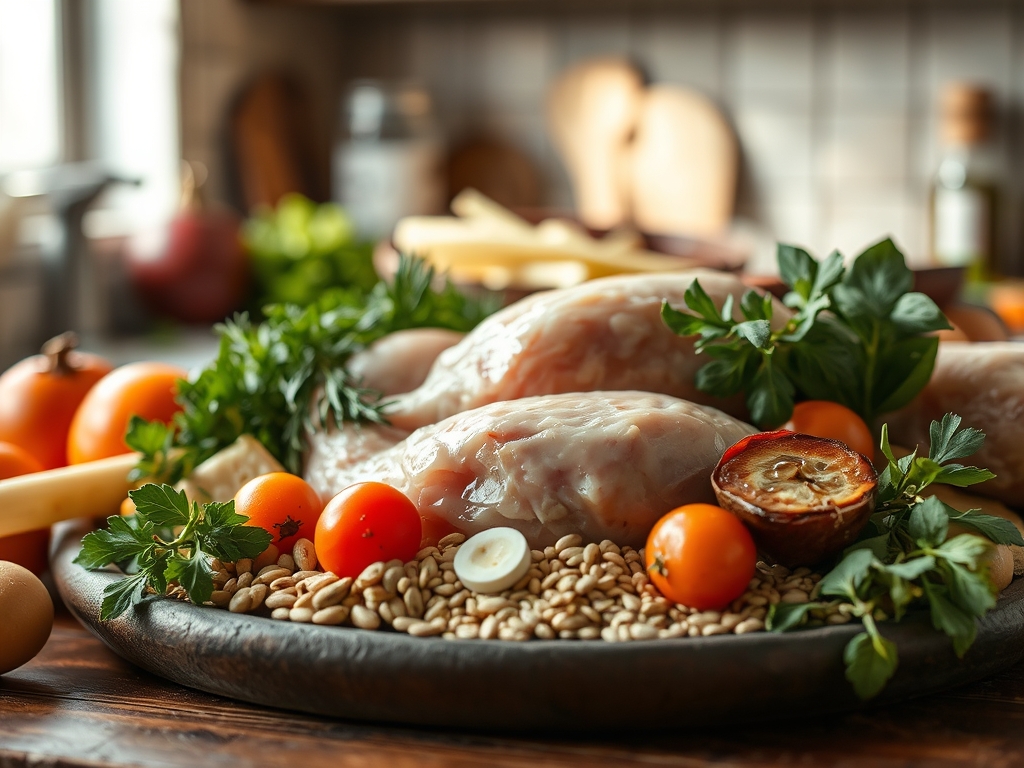
Before we ignite the flame, your mise-en-place must be impeccable. You will need a four to five pound pasture-raised bird. Look for skin that is opaque and tight; this indicates freshness and a lower water content, which is vital for browning. You will also need high-quality unsalted butter, which we will use to create a viscous compound herb fat. Grab your microplane to zest a lemon and grate three cloves of garlic into a fine paste. The piquant aroma of fresh thyme and rosemary will infuse the fat, creating a flavor carrier that penetrates the muscle fibers.
For the aromatics, gather halved shallots, a head of garlic sliced crosswise, and thick wedges of lemon. Use a digital scale to measure your kosher salt; precision here prevents an over-salted disaster. Smart Substitutions: If you are dairy-free, replace the butter with duck fat or a high-smoke-point avocado oil. For a flavor twist, swap the rosemary for za'atar or smoked paprika to shift the profile from French bistro to Middle Eastern hearth.
The Clock:
The "Chef's Flow" is all about managing momentum. Total active prep time is approximately 20 minutes, but the passive time is where the magic happens. You must allow for a 30-minute "tempering" period where the chicken sits at room temperature. This reduces the thermal shock when it hits the oven, ensuring the exterior doesn't overcook before the center reaches safety.
Roasting usually takes 15 to 20 minutes per pound at 425 degrees Fahrenheit. However, the most critical window is the 15-minute rest period post-roast. This allows the internal juices, which have been pushed to the center by the heat, to redistribute through the meat. If you carve too early, you lose that moisture to the cutting board.
The Masterclass:
1. The Desiccation Ritual
Use paper towels to pat the bird until it is bone-dry. Moisture is the enemy of the Maillard reaction. If the skin is damp, the oven's energy is wasted evaporating surface water rather than browning the proteins. For the ultimate crunch, leave the bird uncovered in the fridge for four hours prior to cooking.
Pro Tip: This is known as surface dehydration. By removing moisture, you allow the skin to reach the 300 degree threshold required for enzymatic browning much faster.
2. The Anatomical Truss
Using butcher's twine, secure the wings against the breast and tie the legs together. This creates a uniform shape, protecting the delicate breast meat from being hammered by direct heat while the thicker thighs catch up. A compact bird roasts more evenly than one with splayed limbs.
Pro Tip: Trussing reduces the surface area-to-volume ratio. This slows down the heat transfer to the leanest parts of the bird, preventing the breast from drying out.
3. The Compound Fat Injection
Slide your fingers under the skin of the breast to create a pocket, being careful not to tear the membrane. Stuff your herb butter directly onto the meat. This creates a self-basting mechanism where the fat renders down, frying the skin from the inside out while poaching the meat in aromatics.
Pro Tip: Fat is a poor conductor of heat but an excellent flavor solvent. This subcutaneous basting ensures the fat-soluble compounds in your herbs actually penetrate the meat fibers.
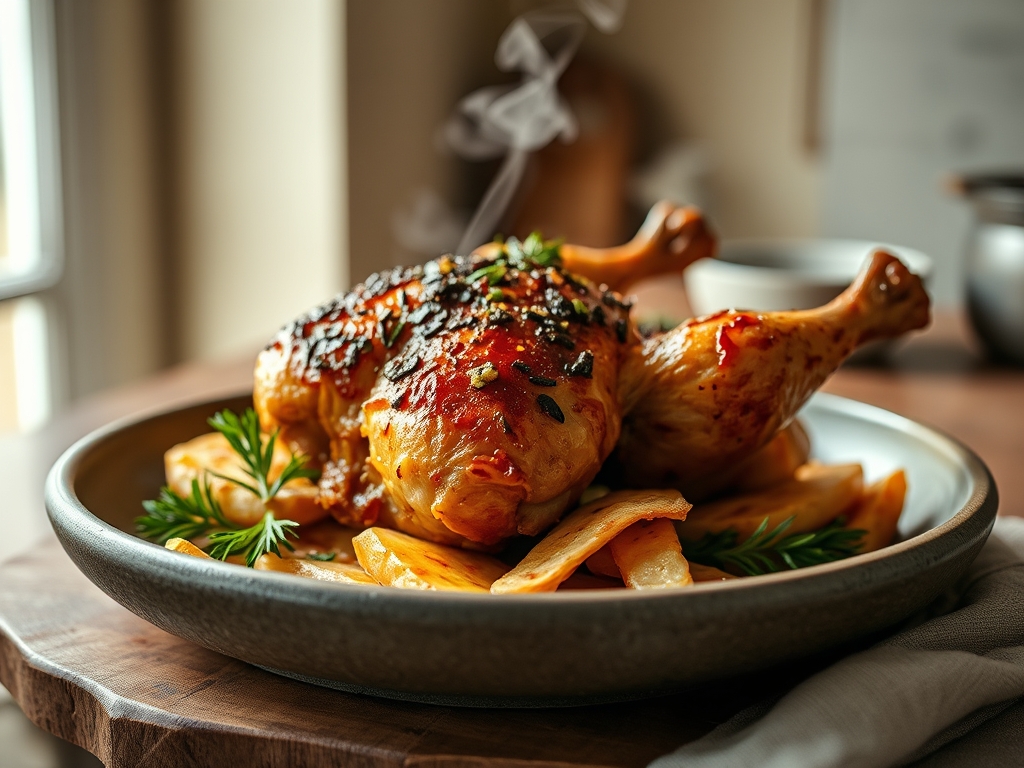
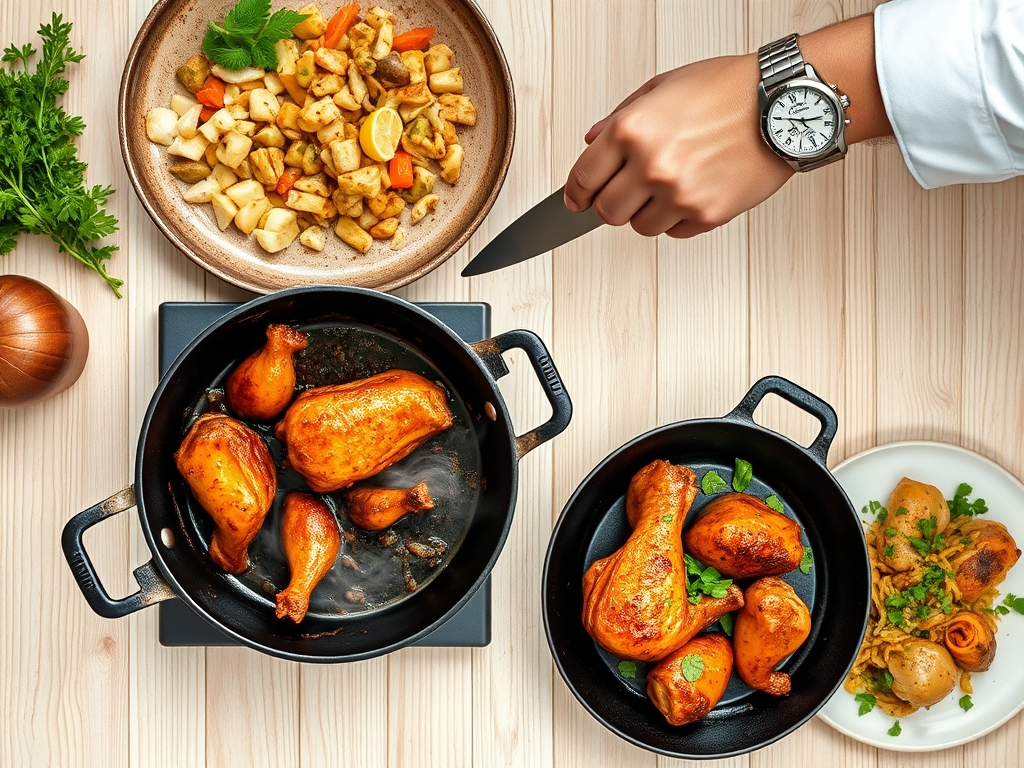
4. The High-Heat Blast
Start your oven at a high temperature, around 425 degrees, and place the bird on a rack inside a heavy-bottomed skillet or roasting pan. The rack is essential for airflow; without it, the bottom of your chicken will boil in its own juices rather than roast.
Pro Tip: High initial heat triggers the Maillard reaction, a chemical reaction between amino acids and reducing sugars that gives browned food its distinctive, savory flavor.
5. The Internal Monitoring
Forget the "clear juices" myth. Use a digital probe thermometer to pull the chicken when the thickest part of the breast hits 160 degrees. The temperature will continue to rise as it rests, reaching the FDA-recommended 165 degrees without overshooting into "cardboard" territory.
Pro Tip: This is called thermal carryover. The residual heat on the surface of the bird continues to move inward even after the heat source is removed.
6. The Deglaze and Rest
Once the bird is on the carving board, place your roasting pan on the stovetop. Add a splash of white wine or stock to the pan drippings. Use a wooden spoon to scrape up the brown bits (the fond). This creates a concentrated, umami-rich jus to serve alongside.
Pro Tip: Deglazing dissolves the caramelized proteins stuck to the pan, capturing the most intense flavors of the roast through solvent action.
The Deep Dive:
Macro Nutrition: A standard 6-ounce serving of roasted chicken provides roughly 42g of protein and 15g of fat. It is a powerhouse of Vitamin B12 and selenium, which are essential for metabolic health.
Dietary Swaps: To make this Keto, stick to the butter and herb method. For a Vegan "roast," use a large cauliflower head, following the same seasoning and high-heat principles, though the cook time will drop to 30 minutes.
The Fix-It:
- Soggy Skin: Your oven temperature was too low or you crowded the pan. Fix: Crank the broiler for the last 2 minutes.
- Dry Breast: You skipped the rest period or didn't use a thermometer. Fix: Shred the meat and toss it in the pan jus to rehydrate.
- Burnt Garlic: You put minced garlic on the skin too early. Fix: Use garlic powder on the exterior and fresh garlic only under the skin or inside the cavity.
Meal Prep: To reheat and maintain "day-one" quality, avoid the microwave. Place slices in a skillet with a tablespoon of water and cover with a lid. The steam will gently re-therm the meat without toughening the proteins.
The Wrap-Up:
Mastering the art of the roast is a rite of passage for any serious home cook. By focusing on moisture control, fat distribution, and precise thermal management, you elevate a simple bird into a culinary event. Remember that the tools you use, from the digital scale to the heavy-bottomed skillet, are just as important as the ingredients. Now, go forth, preheat that oven, and prepare to be the hero of your kitchen.
The Kitchen Table:
How do I get the skin extra crispy?
Ensure the skin is completely dry before roasting. Salt the bird 24 hours in advance and leave it uncovered in the refrigerator. This process, called dry-brining, dehydrates the skin and seasons the meat deeply through osmosis.
Why is my chicken always dry?
You are likely overcooking it or carving it too soon. Always use a digital thermometer to pull the bird at 160 degrees. Let it rest for at least 15 minutes so the juices can redistribute into the muscle fibers.
Should I cover the chicken with foil?
No, covering the chicken traps steam, which results in rubbery, pale skin. Only use foil if the breast is browning too quickly; in that case, create a small foil "tent" over the top to deflect direct heat.
Can I roast a chicken from frozen?
It is not recommended. The exterior will overcook and dry out before the center reaches a safe temperature. Always thaw your chicken completely in the refrigerator for 24 to 48 hours before attempting to roast it for even results.