
Close your eyes and listen for that specific, rhythmic crackle of starch meeting shimmering fat. It is the sound of a perfect Saturday morning. We have all chased that elusive golden ratio: a glass-shattering exterior that yields to a center as fluffy as a cloud. While many simple fried potato recipes promise greatness, the difference between a soggy mess and a culinary masterpiece lies in the molecular architecture of the tuber itself.
We are diving deep into the chemistry of the crunch today. This is not just about tossing spuds in a pan; it is about managing moisture, manipulating starch structures, and mastering the Maillard reaction. Whether you are aiming for a rustic home fry or a sophisticated pomme frites, the principles remain the same. We are going to transform the humble potato into something truly transcendent using nothing but heat, fat, and a little bit of clever physics. Grab your heavy-bottomed skillet and let's get to work.
The Gathers:
To achieve the ultimate result, your mise-en-place must be precise. Start with Russet potatoes, which are high-starch and low-moisture; this is non-negotiable for that airy interior. You will need a high-smoke-point fat such as refined avocado oil or, for a more traditional profile, rendered duck fat. The viscosity of the fat determines how effectively it coats the irregular surfaces of the potato.
Gather your tools: a digital scale for consistency, a bench scraper to move your dice without bruising the starch, and a heavy-bottomed skillet (cast iron is king here) to ensure even thermal distribution. You will also need kosher salt, which has a jagged crystal structure that adheres better than fine table salt.
Smart Substitutions: If you are avoiding nightshades, Japanese Sweet Potatoes offer a similar starch-to-sugar ratio. For a piquant twist, swap standard salt for smoked Maldon flakes or infuse your oil with smashed garlic cloves and rosemary sprigs during the final three minutes of cooking.
The Clock
The "Chef's Flow" is all about timing your thermal stages. Total active time is roughly 15 minutes, but the passive stages are where the magic happens.
- Prep (10 Minutes): Scrubbing, dicing, and the crucial starch-wash.
- The Par-Cook (8 Minutes): A quick simmer to gelatinize the exterior.
- The Dry-Down (15 Minutes): Passive cooling to allow moisture to evaporate.
- The Golden Fry (12-15 Minutes): The high-heat transformation.
By respecting these windows, you ensure that the center is fully cooked before the outside over-browns. Rushing the "Dry-Down" phase is the number one reason for steam-trapped, soggy potatoes.
The Masterclass:
1. The Precision Dice
Consistency is your best friend. Use your bench scraper to keep your workspace clean as you cut the potatoes into uniform 1/2-inch cubes. Uniformity ensures that every piece reaches the same internal temperature at the same moment.
Pro Tip: This prevents enzymatic browning, the oxidation process that turns potatoes gray. Keeping them submerged in cold, salted water immediately after cutting halts this reaction and preserves the bright white interior.
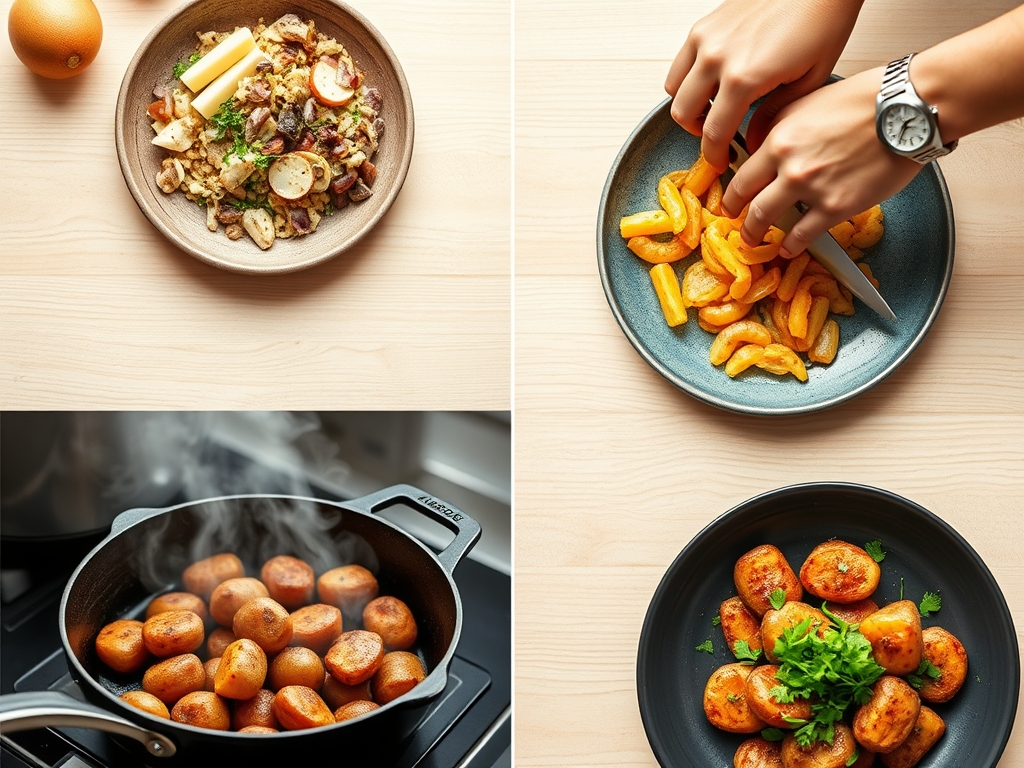
2. The Alkaline Par-Boil
Place your potatoes in a pot of cold water with a pinch of baking soda. Bring to a boil and simmer until the edges are just starting to soften.
Pro Tip: Adding baking soda raises the pH of the water, which breaks down the pectin in the potato skin. This creates a starchy "slurry" on the surface that eventually fries into an extra-thick, craggy crust.
3. The Steam Release
Drain the potatoes and spread them out on a wire rack. Let them sit until they are no longer steaming.
Pro Tip: This stage utilizes evaporative cooling. Removing surface moisture is essential because water is the enemy of the crunch. If you put wet potatoes in oil, the energy is wasted evaporating water rather than browning the starch.
4. The Fat Infusion
Heat your heavy-bottomed skillet over medium-high heat. Add your oil or fat, ensuring it is shimmering but not smoking. Gently add the potatoes, making sure not to crowd the pan.
Pro Tip: Crowding the pan causes a massive thermal drop. If the oil temperature falls too low, the potatoes will absorb the fat rather than searing, resulting in a greasy, limp texture.
5. The Maillard Wait
Resist the urge to stir. Let the potatoes sit undisturbed for at least 4 to 5 minutes until a deep golden crust forms on the bottom.
Pro Tip: This is the Maillard reaction in action. It is a chemical reaction between amino acids and reducing sugars that gives browned food its distinctive flavor. Moving them too early tears the delicate, gelatinized starch layer.
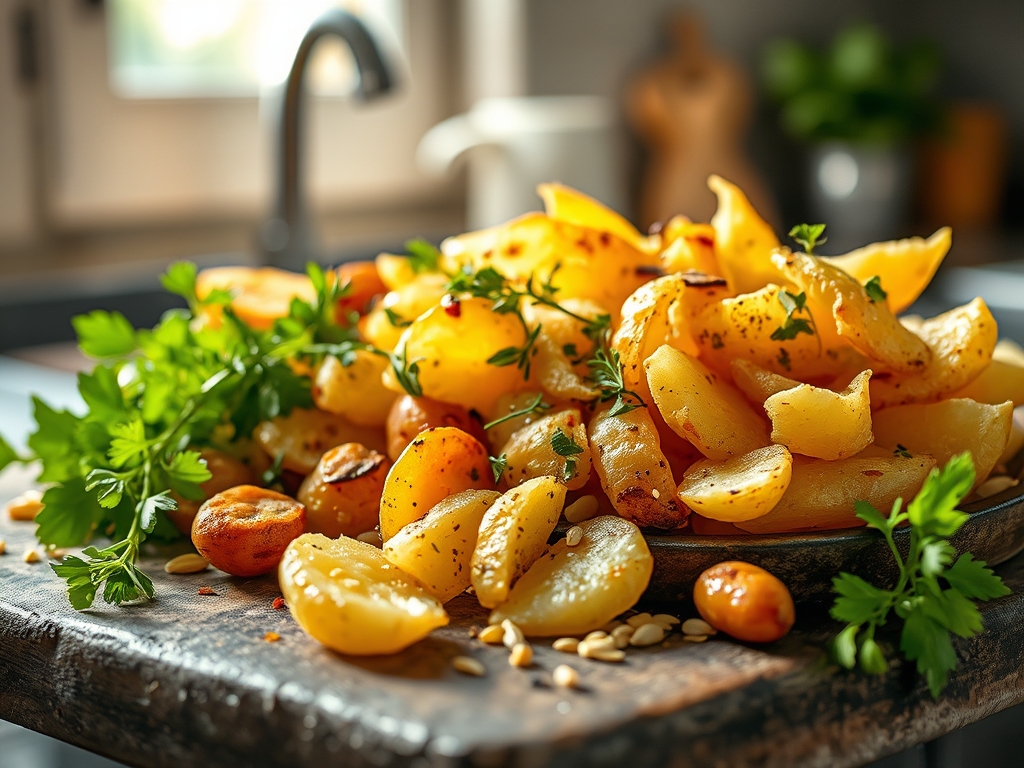
6. The Aeration Toss
Once the first side is crisp, use tongs or a metal spatula to flip the potatoes. Toss them occasionally to ensure all facets are exposed to the direct heat of the skillet.
Pro Tip: Tossing aerates the potatoes, allowing trapped steam to escape and further dehydrating the crust for a shatter-crisp finish.
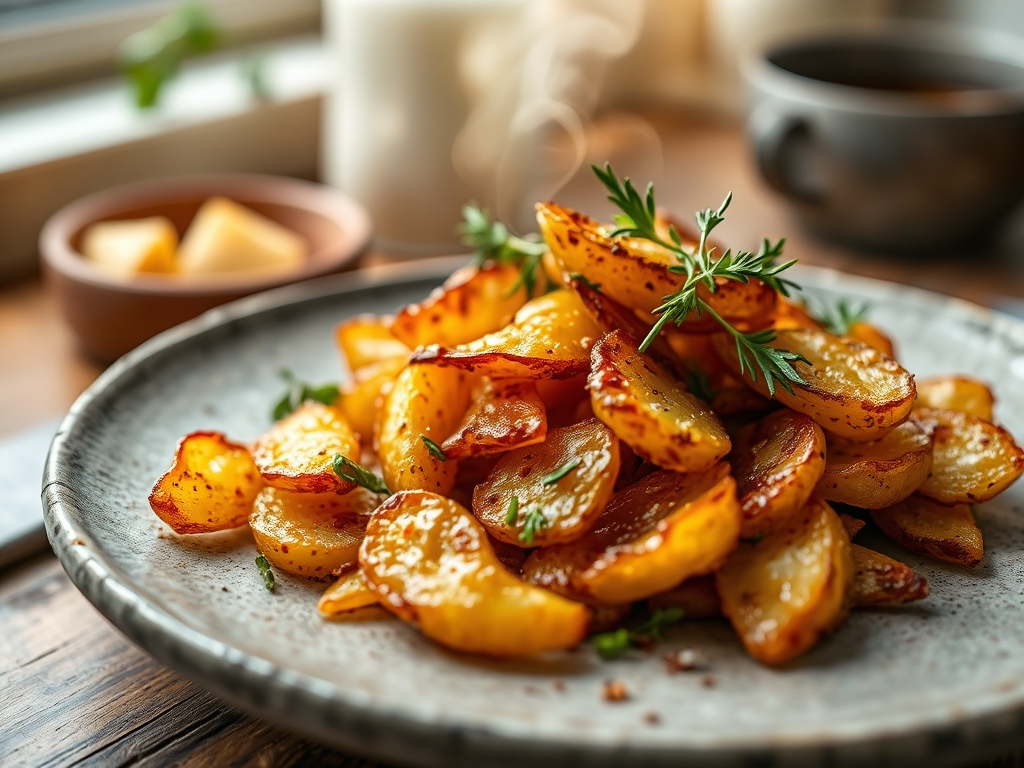
7. The Finishing Season
Transfer the potatoes to a paper-towel-lined bowl and immediately shower them with salt and any dry spices like smoked paprika or garlic powder.
Pro Tip: Use thermal carryover to your advantage. The potatoes continue to cook for a minute after leaving the pan. Seasoning while they are hot allows the salt to dissolve slightly into the residual surface oil, locking in the flavor.
The Deep Dive
Macro Nutrition: One serving of these potatoes provides roughly 220 calories, 4g of fiber, and 3g of protein. While they are a carbohydrate-dense side, using high-quality fats like duck fat or avocado oil provides essential monounsaturated fats.
Dietary Swaps:
- Vegan: Use refined coconut oil or avocado oil.
- Keto: Substitute potatoes with daikon radish or celery root. The cook times will vary, but the par-boil method still applies.
- Gluten-Free: Potatoes are naturally GF, but ensure your seasoning blends do not contain anti-caking agents derived from wheat.
The Fix-It:
- Potatoes are sticking: Your pan wasn't hot enough or you tried to flip them too soon. Wait for the starch to release naturally.
- Burnt outside, raw inside: Your heat is too high. Lower the flame and use a lid for 2 minutes to trap heat and soften the core.
- Soggy results: You skipped the dry-down phase. Next time, use a hair dryer or a fan to speed up surface evaporation.
Meal Prep & Reheating: To maintain "day-one" quality, never use a microwave. Reheat leftovers in an air fryer at 400F for 4 minutes or in a dry skillet. This re-activates the fats and recrisps the dehydrated starch layer.
The Wrap-Up
Mastering simple fried potato recipes is a rite of passage for any home cook. It is a beautiful intersection of chemistry and comfort. By understanding how to manipulate pectin with alkaline water and respecting the power of the Maillard reaction, you have moved beyond a basic recipe into the realm of culinary artistry. Now, go forth, grab your finest saucier for a side of aioli, and enjoy the crunch you have rightfully earned.
The Kitchen Table
Which potato is best for frying?
Russet potatoes are the gold standard. Their high starch content and low moisture levels create a dry, mealy texture that becomes incredibly fluffy when fried, while the exterior dehydrates into a thick, crunchy shell.
Why do my fried potatoes turn out soft?
Softness usually stems from excess moisture. If you don't dry the potatoes thoroughly after washing or par-boiling, the water turns to steam in the pan. This steams the potato from the outside in, preventing a crust from forming.
Can I fry potatoes without boiling them first?
You can, but the texture will be inferior. Par-boiling gelatinizes the surface starch, creating more surface area for the oil to grab onto. This results in a much thicker, crunchier crust than frying raw potatoes.
What is the best oil for frying potatoes?
Use oils with a high smoke point, such as avocado, grapeseed, or peanut oil. These can withstand the high temperatures required for the Maillard reaction without breaking down or imparting a bitter, burnt flavor to your spuds.