
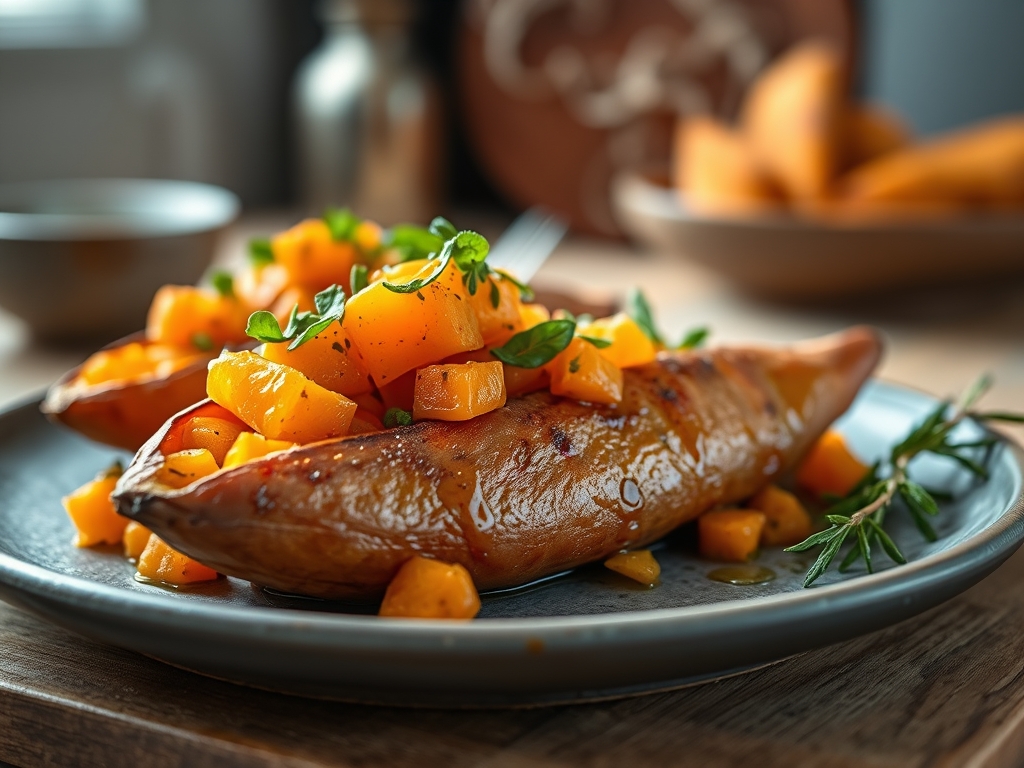
Picture a rainy Tuesday where the pantry feels like a desert; then you spot that humble, dusty tin of yams. Most people see a holiday side dish, but we are about to unlock a world of high-velocity flavor. Finding incredible sweet potato recipes using canned sweet potatoes is the ultimate culinary hack for the modern, busy kitchen.
The magic of the canned variety lies in the pre-processing. These tubers have already undergone high-pressure steam blanching; this breaks down complex starches into maltose before they ever reach your kitchen. Because the cell walls are already softened, we can skip the hour-long roasting process and jump straight into the Maillard reaction. This chemical process occurs when amino acids and reducing sugars meet high heat, creating those savory, toasted notes we crave. From velvety gnocchi to spiced breakfast hashes, we are transforming a shelf-stable staple into a five-star meal. Let us get into the chemistry of why this works.
The Gathers:
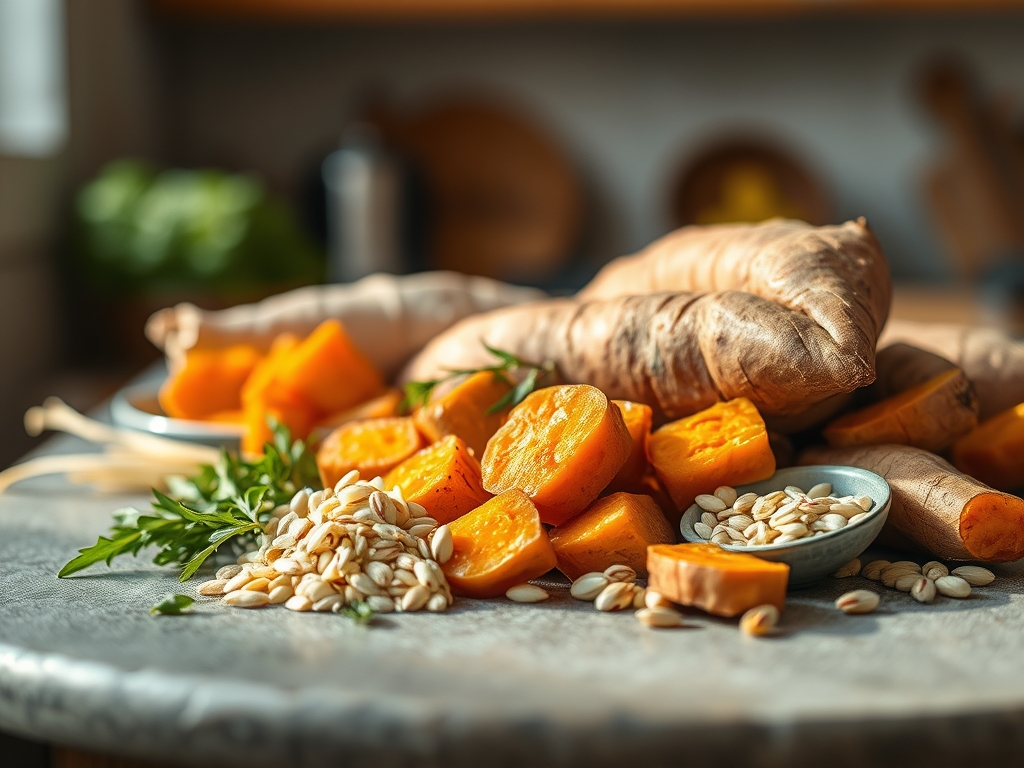
To master these sweet potato recipes using canned sweet potatoes, your mise-en-place must be precise. Start with a 29-ounce can of yams or sweet potatoes. Note the packing liquid; it is a viscous syrup rich in dissolved polysaccharides. You will also need high-fat emulsifiers like heavy cream or full-fat coconut milk to carry the fat-soluble vitamins.
Your toolkit is non-negotiable for professional results. Reach for a microplane to zest fresh ginger, a heavy-bottomed skillet for even heat distribution, and a digital scale to ensure your flour-to-puree ratio is exact. For aromatics, gather fresh sage, smoked paprika, and cloves.
Smart Substitutions: If you find the canned syrup too cloying, rinse the potatoes in a colander and pat them dry with a lint-free towel. This allows you to control the glycemic profile. For a vegan swap, use aquafaba (chickpea liquid) as a binder instead of eggs; the proteins in aquafaba mimic the structural integrity of egg whites during the baking process.
The Clock
The "Chef's Flow" is all about overlapping tasks to minimize downtime.
- Prep Time: 10 minutes. This involves draining, rinsing, and pureeing.
- Active Cook Time: 15 to 25 minutes depending on the application.
- Total Time: 35 minutes.
The secret to efficiency is the saucier. While your sweet potatoes are rendering in the skillet, use a small saucier to brown your butter. By the time the potatoes have developed a crust, your butter will have reached that nutty, amber state known as beurre noisette. This synchronization ensures that the volatile aromatic compounds in the butter do not dissipate before they hit the plate.
The Masterclass
1. The Velvety Puree Base
Drain your canned potatoes and pass them through a fine-mesh sieve or use a bench scraper to push them through a ricer. This mechanical breakdown ensures a perfectly smooth texture without overworking the starches.
Pro Tip: Avoid using a high-speed blender for too long. Over-processing releases excess starch, which can turn your puree "gluey" due to the shearing of starch granules.
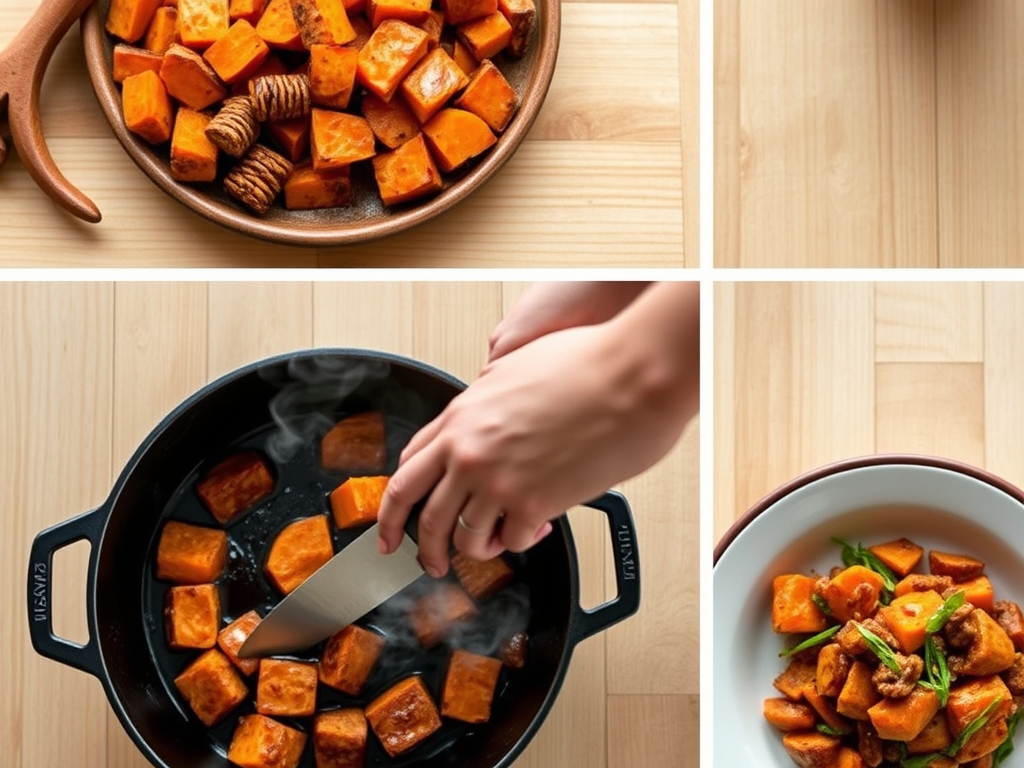
2. The Sear and Render
Heat your heavy-bottomed skillet over medium-high heat with a tablespoon of neutral oil. Add the chunks of sweet potato, leaving space between each piece to allow steam to escape.
Pro Tip: This stage utilizes thermal carryover. Even after you remove the pan from the heat, the internal temperature continues to rise, finishing the caramelization of the natural sugars without burning the exterior.
3. Emulsifying the Sauce
Lower the heat and add your liquid of choice, such as vegetable stock or cream. Use a whisk to emulsify the fats with the sugars from the potato.
Pro Tip: Use a "pan sauce" technique to deglaze the skillet. The brown bits stuck to the bottom, called fond, contain concentrated flavor molecules that provide a savory backbone to the dish.
4. Aerating the Batter
If you are making pancakes or muffins, fold the potato puree into your dry ingredients using a silicone spatula.
Pro Tip: Do not overmix. You want to aerate the mixture just enough to incorporate air. This prevents the development of a tough gluten network, keeping your baked goods tender.
5. Infusing the Aromatics
Add your spices during the final five minutes of cooking.
Pro Tip: This is called "blooming" the spices. Fat-soluble compounds in cinnamon and nutmeg are released more effectively when heated in a lipid base, creating a more piquant and complex flavor profile.
6. The Final Reduction
Simmer your mixture until it reaches the desired thickness.
Pro Tip: Watch for the "nappe" consistency, where the sauce is thick enough to coat the back of a spoon. This indicates that the water has evaporated sufficiently to concentrate the flavors.
7. Resting the Dish
Allow your creation to sit for three minutes before serving.
Pro Tip: Resting allows the moisture to redistribute through the starch molecules. This prevents the dish from feeling "watery" on the palate.
8. The Garnish Finish
Use your microplane to shave fresh parmesan or lemon zest over the top right before serving.
Pro Tip: The volatile oils in fresh zest are highly sensitive to heat. Adding them at the very end ensures the brightest olfactory impact.
The Deep Dive
Macro Nutrition: Canned sweet potatoes are a powerhouse of Vitamin A (as beta-carotene) and potassium. While the canning process involves heat, the fiber content remains largely intact. One cup provides roughly 180 calories and 4 grams of fiber.
Dietary Swaps:
- Vegan: Replace butter with avocado oil and use nutritional yeast for a "cheesy" umami hit.
- Keto: While sweet potatoes are higher in carbs, you can use a smaller amount of puree as a thickener for a keto-friendly beef stew.
- Gluten-Free: Use almond flour or cassava flour when making sweet potato fritters.
The Fix-It:
- Too Sweet: Add a teaspoon of apple cider vinegar or lemon juice. The acidity cuts through the sugar and balances the pH of the dish.
- Too Mushy: Spread the puree on a baking sheet and bake at 400 degrees for 10 minutes. This evaporates excess moisture and firms up the texture.
- Bland Flavor: You likely need more salt. Salt suppresses bitterness and enhances the perception of sweetness and aromatics.
Meal Prep: To reheat, avoid the microwave if possible. Use a toaster oven or a skillet to re-crisp the edges. If you must use a microwave, place a damp paper towel over the bowl to prevent the edges from becoming leathery.
The Wrap-Up
You are now officially a wizard of the pantry. By understanding the molecular behavior of starch and the importance of the Maillard reaction, you have turned a simple canned good into a culinary masterpiece. These sweet potato recipes using canned sweet potatoes prove that you do not need hours of prep to achieve professional-grade results. Go forth, grab that can opener, and start creating something delicious.
The Kitchen Table
Can I use the syrup from the can?
Yes, but use it sparingly. The syrup is a concentrated sugar solution that works well as a glaze for roasted meats or a sweetener for baked goods. Always taste it first to ensure it is not overly metallic.
How do I make canned sweet potatoes less mushy?
Drain them thoroughly and pat them dry with paper towels. Searing them in a hot heavy-bottomed skillet with a bit of butter or oil will create a crisp exterior crust that provides a necessary textural contrast.
Are canned sweet potatoes as healthy as fresh?
Mostly, yes. While some water-soluble vitamins are lost during the canning process, the beta-carotene and fiber remain stable. To maximize health benefits, choose varieties packed in water or juice rather than heavy syrup to keep sugar low.
How long do opened canned sweet potatoes last?
Once opened, transfer the potatoes to an airtight glass or plastic container. They will stay fresh in the refrigerator for three to four days. Do not store them in the original metal can, as this can affect the flavor.