
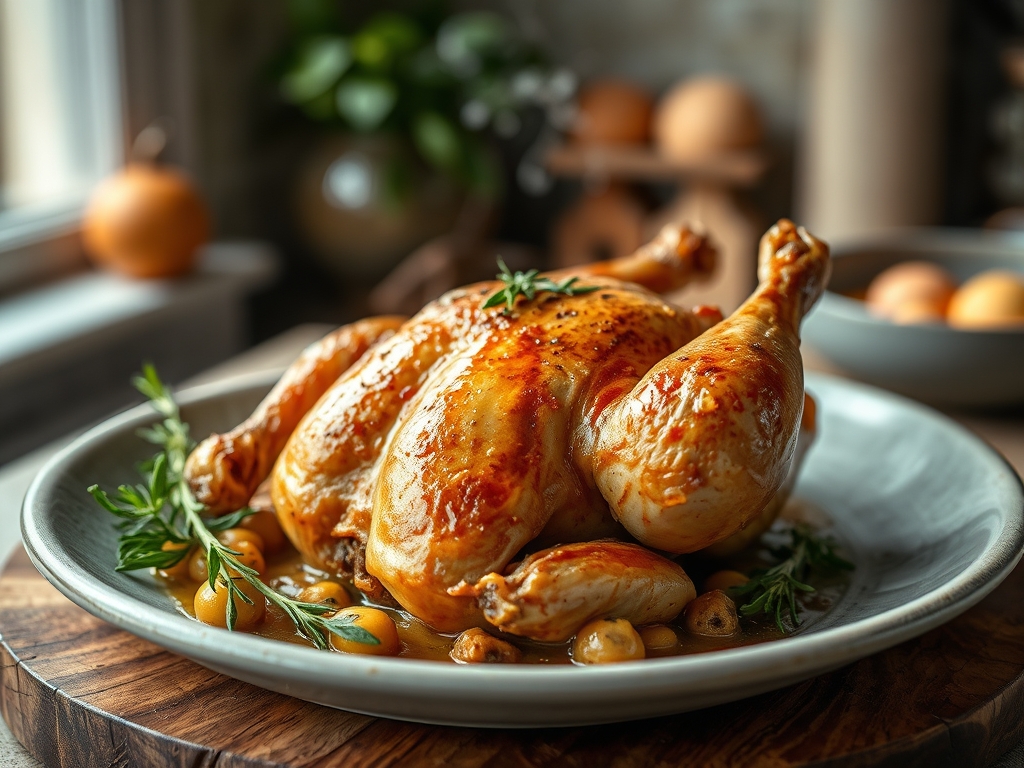
Imagine the sound of a heavy cast iron lid sliding into place; a metallic ring that signals the start of a transformation. Inside that dark, humid chamber, heat begins to circulate, rendering fat and saturating every fiber of the meat with concentrated aromatics. When you master whole chicken recipes dutch oven style, you are not just cooking; you are engineering the perfect balance of steam-infused tenderness and Maillard-driven crust. The Dutch oven acts as a miniature kiln, trapping moisture that would otherwise escape in a standard roasting pan, ensuring that the breast meat remains succulent while the thighs reach that fall-off-the-bone state of grace. We are moving beyond basic roasting into the realm of braising-roasting hybrids, where the skin stays golden and the interior stays buttery. Whether you are craving a piquant lemon-herb finish or a viscous red wine reduction, these methods turn a humble bird into a centerpiece that commands the table. It is time to reclaim your Sunday night with the most reliable vessel in your kitchen cabinet.
The Gathers:
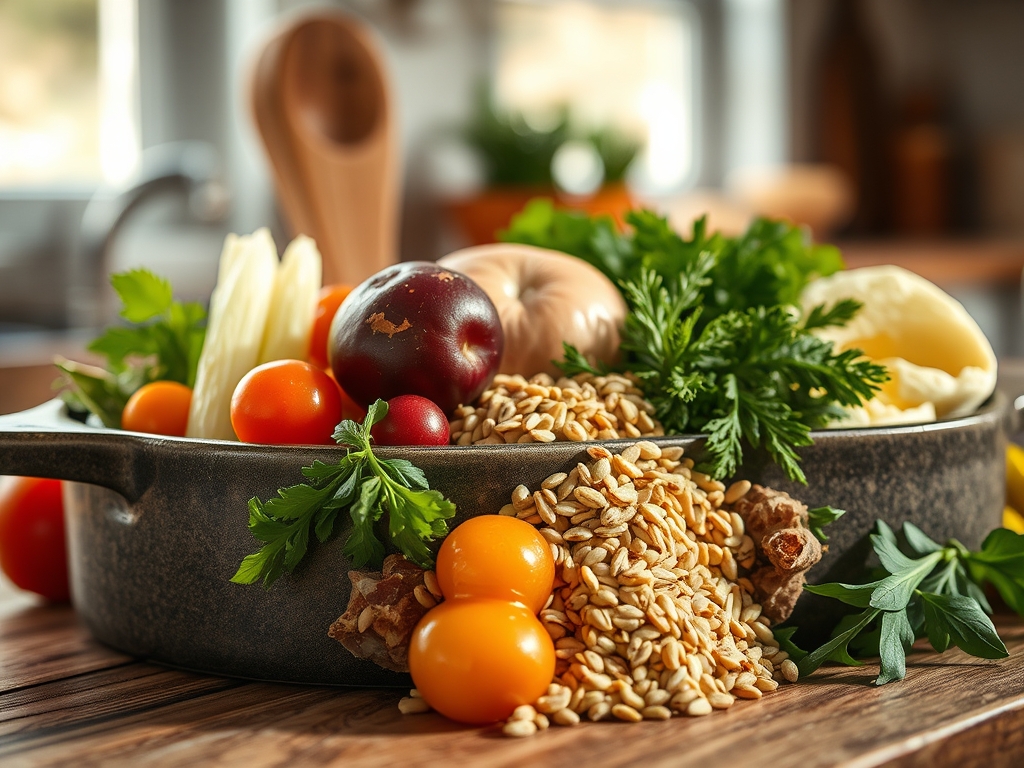
To execute these whole chicken recipes dutch oven masters swear by, your mise-en-place must be precise. Start with a four to five-pound bird, ideally organic to ensure a cleaner fat profile during the rendering process. You will need high-quality fats; unsalted European-style butter offers a higher butterfat content, which is essential for a rich mouthfeel, while avocado oil provides a high smoke point for the initial sear.
Gather your aromatics: whole cloves of garlic to be smashed, shallots for a delicate sweetness, and woody herbs like rosemary and thyme. Use a microplane to zest lemons directly over the bird to capture the volatile oils before they evaporate. For the liquid base, a dry white wine like Sauvignon Blanc or a fortified chicken bone broth will provide the necessary acidity and gelatinous body.
Smart Substitutions:
If you lack fresh herbs, use a high-quality dried poultry seasoning at one-third the volume, as dried herbs are more concentrated. No wine? A splash of verjuice or apple cider vinegar diluted in water provides that essential piquant brightness. For a dairy-free version, replace butter with ghee or a neutral coconut oil to maintain the fat-to-protein ratio required for browning.
The Clock: Timing the Perfect Roast
Precision timing is the difference between a dry bird and a masterpiece. Expect a total active prep time of 20 minutes; this includes cleaning the cavity, trussing, and seasoning. The cooking duration generally follows a 20-minute-per-pound rule at 375 degrees Fahrenheit, but the "Chef's Flow" suggests a two-stage approach.
First, a 15-minute high-heat sear on the stovetop to jumpstart the browning. Second, a 60 to 75-minute covered roast to allow the connective tissues to break down via gentle conduction. Finally, a 10-minute rest period is non-negotiable. During this time, the internal juices redistribute from the center back to the extremities, preventing the liquid from rushing out the moment you use your bench scraper or carving knife.

The Masterclass:
1. The Prep and Pat-Down
Remove the chicken from the refrigerator 30 minutes prior to cooking to take the chill off. Use paper towels to vigorously dry the skin. Moisture is the enemy of the Maillard reaction; if the skin is damp, it will steam rather than crisp.
Pro Tip: This is known as surface dehydration. By removing external moisture, you allow the heat to immediately begin breaking down proteins and sugars into flavorful brown compounds rather than wasting energy evaporating water.
2. The Strategic Seasoning
Generously salt the bird inside and out using Kosher salt. Use your fingers to loosen the skin over the breast and shove flavored butter or herb paste directly onto the meat. Use tongs to rotate the bird, ensuring even coverage.
Pro Tip: Salt acts as a denaturant, unwinding the protein strands so they can trap more water. This "dry brining" ensures the meat stays juicy even if the oven temperature fluctuates slightly.
3. The Stovetop Sear
Heat your Dutch oven over medium-high heat with a tablespoon of oil. Place the chicken breast-side down. Sear until deep golden brown, then rotate. This builds a foundation of flavor in the bottom of the pot.
Pro Tip: This stage initiates enzymatic browning. The fond (the brown bits stuck to the pot) is a concentrated source of umami that will eventually dissolve into your sauce during the deglazing phase.
4. The Aromatics and Deglaze
Remove the chicken briefly. Toss in your mirepoix (carrots, celery, onions) and sauté until translucent. Pour in your wine or broth, using a wooden spoon to scrape the bottom of the vessel.
Pro Tip: Deglazing releases the caramelized proteins into the liquid. The alcohol in the wine acts as a solvent, pulling out flavors that are not water-soluble, creating a more complex flavor profile.
5. The Covered Roast
Place the chicken back into the pot, resting it on top of the vegetables. Secure the lid tightly. Transfer the Dutch oven to the center rack of your preheated oven.
Pro Tip: The heavy lid creates a high-pressure steam environment. This allows the collagen in the tough leg and thigh tissues to convert into gelatin at a lower temperature, resulting in a silkier texture.
6. The Final Unveiling
For the last 15 minutes of cooking, remove the lid. This allows the humid air to escape and the dry heat of the oven to re-crisp the skin that may have softened during the steaming phase.
Pro Tip: This is the evaporative cooling phase. Removing the lid drops the humidity, allowing the skin temperature to rise above 212 degrees Fahrenheit, which is necessary for the final crisping.
7. The Rest and Carve
Lift the chicken out and place it on a cutting board. Let it sit for at least 10 minutes. While it rests, you can use a saucier to reduce the remaining pot liquids into a thick, glossy jus.
Pro Tip: Thermal carryover will cause the internal temperature to rise by another 5 to 10 degrees. Resting prevents the muscle fibers from contracting and squeezing out the precious intracellular moisture.
The Deep Dive:
From a macro perspective, a four-ounce serving of Dutch oven chicken provides approximately 25g of protein and 11g of fat, depending on skin consumption. It is naturally low-carb and Keto-friendly. For a Vegan alternative, use the same Dutch oven technique with a large head of cauliflower or "lion's mane" mushrooms, basting with olive oil and miso for depth.
The Fix-It:
- Soggy Skin: If the skin is flabby, your oven temp was too low or you didn't sear long enough. Fix: Flash it under the broiler for 2 minutes.
- Tough Meat: Usually a result of skipping the rest period. Fix: Slice the meat and let it sit in the warm pot juices for 5 minutes to rehydrate.
- Burnt Bottom: If the vegetables scorched, there wasn't enough liquid. Fix: Strain the sauce through a fine-mesh sieve and add a pinch of sugar to mask the bitterness.
Meal Prep Science:
To maintain "day-one" quality, store leftovers in an airtight container with a spoonful of the cooking liquid. When reheating, use a low temperature (300F) and cover with foil. This prevents the "warmed-over flavor" caused by lipid oxidation, keeping the fats stable and the meat tender.
The Wrap-Up:
Mastering whole chicken recipes dutch oven style is a rite of passage for any home cook. It combines the technical rigor of French braising with the soul-warming comfort of a traditional roast. By understanding the physics of steam and the chemistry of the Maillard reaction, you transform a simple grocery staple into a culinary event. So, grab your heavy-bottomed pot, trust the process, and get ready for the best chicken of your life.
The Kitchen Table:
Can I cook a frozen chicken in a Dutch oven?
It is not recommended. Frozen poultry cooks unevenly, leaving the center dangerously undercooked while the exterior overcooks. Always thaw completely in the refrigerator for 24 hours to ensure food safety and even heat distribution during the roasting process.
Why is my Dutch oven chicken not crispy?
Crispiness requires dry heat. If the lid stays on too long, the skin steams. To fix this, ensure you pat the skin dry before searing and remove the lid for the final 15 to 20 minutes of roasting.
Do I need to add liquid to the pot?
While the chicken releases its own juices, adding a half-cup of broth or wine prevents the aromatics from burning. This liquid also creates the steam necessary to break down connective tissues, ensuring the meat stays tender and succulent.
What size Dutch oven is best for a whole chicken?
A 5 to 7-quart Dutch oven is ideal. It provides enough space for the heat to circulate around a standard four-pound bird without being so large that the cooking liquids evaporate too quickly and burn the bottom.