
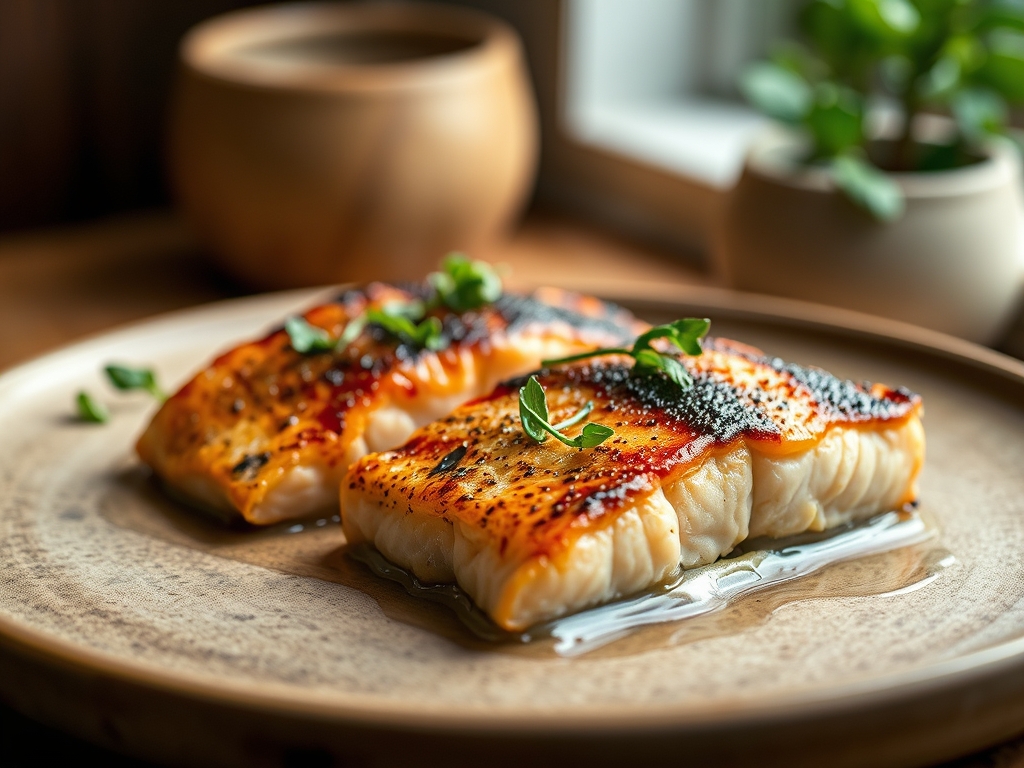
Imagine the sound of a cold fillet hitting a shimmering pool of oil; it is a violent, beautiful sizzle that promises a crust as crisp as a fresh autumn leaf. We have all been there, staring at a sad, grey piece of fish that stuck to the pan, but mastering easy pan seared salmon recipes is actually about understanding the physics of heat transfer rather than just luck. You want that translucent, buttery center contrasted against a salty, golden exterior that shatters when your fork touches it. It is the ultimate weeknight flex because it looks like a forty dollar entree but takes less time than ordering delivery.
The secret lies in the moisture. Water is the enemy of the Maillard reaction, which is the chemical dance between amino acids and reducing sugars that gives us that savory, browned flavor profile. If your salmon is wet, it boils; if it is dry, it sears. We are going to dive into the molecular mechanics of the perfect crust so you can stop guessing and start cooking with the confidence of a line cook on a Friday night. Grab your favorite heavy bottomed skillet and let us get into the chemistry of the sea.
The Gathers:
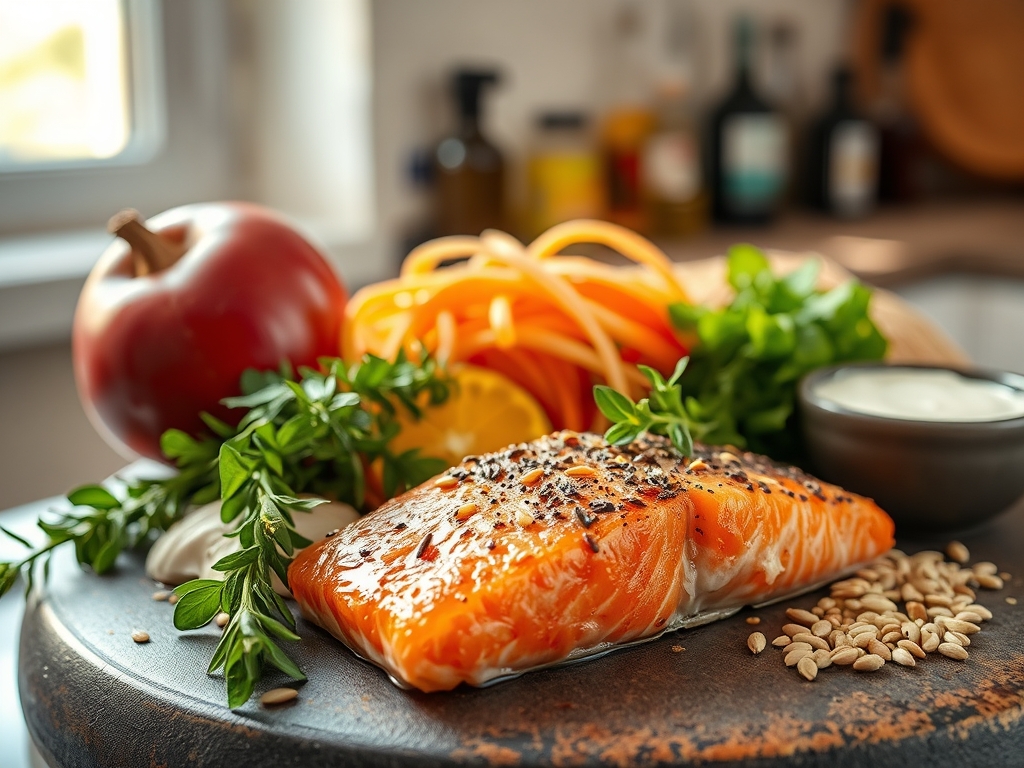
Your mise en place is the foundation of success. Start with center cut Atlantic or King salmon fillets, ideally six to eight ounces each for uniform heat distribution. You will need a high smoke point fat; think avocado oil or clarified butter (ghee) rather than extra virgin olive oil, which breaks down and turns acrid at the temperatures required for a proper sear.
Gather your aromatics: fresh thyme sprigs, crushed garlic cloves, and a cold knob of unsalted butter for the final arrosage, or butter basting. For the seasoning, use flaky sea salt and freshly cracked black pepper. If you want a piquant kick, have a lemon ready to zest with your microplane.
Smart Substitutions: If you are dairy free, swap the butter for a refined coconut oil to achieve that viscous mouthfeel without the lactose. For a flavor pivot, replace the thyme with rosemary or even a dash of smoked paprika to infuse the oil with earthy depth. Always use a digital scale to ensure your fillets are of equal weight, which guarantees they finish cooking at the exact same moment.
The Clock
Efficiency in the kitchen is what we call Chef's Flow. The total active time for this dish is a mere fifteen minutes, but the sequencing is vital. Spend five minutes on prep: patting the fish dry, seasoning, and heating the pan. The actual cook time is approximately eight to ten minutes depending on the thickness of the cut.
The flow works like this: heat the pan while you prep the fish, sear skin side down for the majority of the time to build a heat shield, and finish with a quick flip and a butter bath. This rhythm prevents the protein from tightening too quickly, which can squeeze out the internal juices and leave you with a dry, fibrous texture.
The Masterclass
1. The Desiccation Ritual
Use a paper towel to press every bit of moisture off the skin and flesh. If the skin feels tacky, keep wiping. A dry surface allows the lipids in the pan to immediately begin the browning process.
Pro Tip: This is about surface tension. If water is present, the energy of the pan is wasted on evaporating that liquid at 212 degrees Fahrenheit instead of searing the protein at 300 degrees plus.
2. The Cold Start Myth
Heat your heavy bottomed skillet (cast iron or stainless steel) over medium high heat until the oil shimmers and just begins to wisps of smoke. Do not put the fish in a cold pan or it will bond to the metal on a molecular level.
Pro Tip: This prevents protein bonding. A hot pan creates an immediate steam barrier between the fish and the metal, allowing for a clean release later.
3. The Weight of Gold
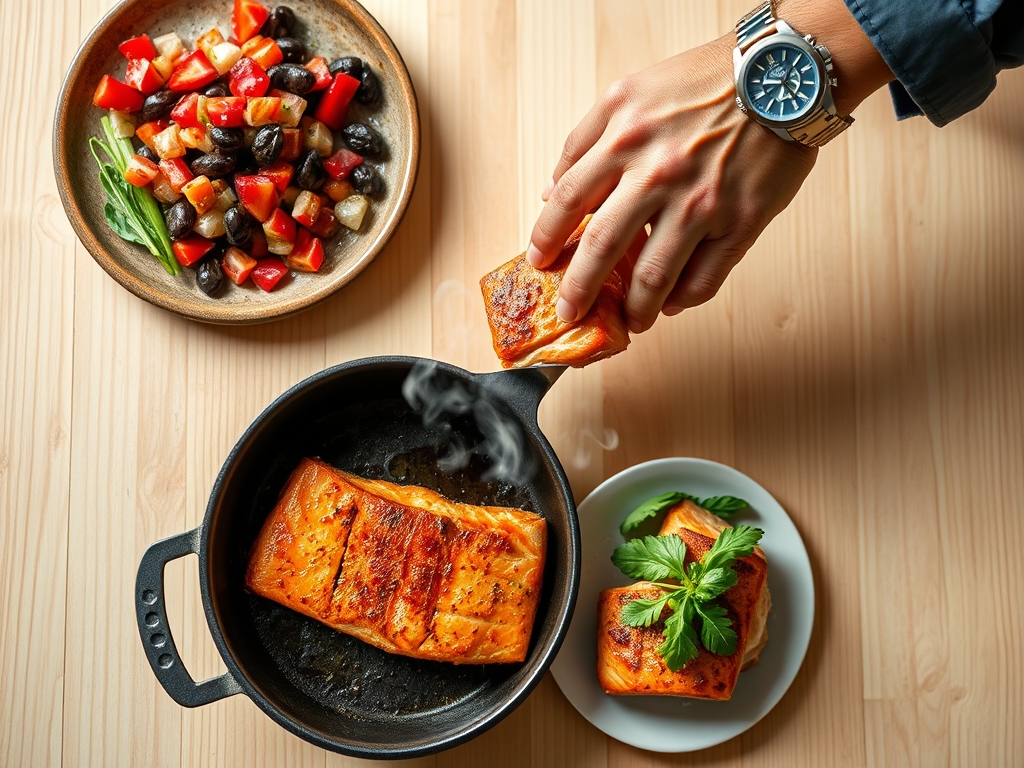
Lay the fillet in the pan away from you to avoid oil splatter. Use a bench scraper or a flexible fish spatula to press down firmly on the fillet for the first thirty seconds.
Pro Tip: Salmon skin tends to curl when it hits heat due to collagen contraction. Pressing it flat ensures every millimeter of skin makes contact with the heat for an even, glass like crunch.
4. The Patience Phase
Leave it alone. Let the fish cook about 80 percent of the way on the skin side. You will see the color change from translucent pink to opaque beige creeping up the side of the fillet.
Pro Tip: The skin acts as an insulator. By cooking mostly on one side, you protect the delicate fats in the flesh from breaking down too quickly, keeping the interior lush.
5. The Flip and Infuse
Flip the fish gently using tongs. Immediately drop in your butter, garlic, and thyme. As the butter foams, tilt the pan and use a large spoon to pour that flavored fat over the crispy skin.
Pro Tip: This is enzymatic browning. The milk solids in the butter caramelize, adding a nutty toasted flavor while the aromatics infuse the fat through fat soluble volatile compounds.
6. The Rest
Remove the salmon when a meat thermometer reads 125 degrees Fahrenheit for medium rare. Place it on a warm plate and let it sit for three minutes.
Pro Tip: This accounts for thermal carryover. The internal temperature will continue to rise about five degrees while resting, and the muscle fibers will relax to reabsorb the juices.
The Deep Dive
From a nutritional standpoint, salmon is a powerhouse of Omega 3 fatty acids and high quality protein. One six ounce serving provides roughly 34 grams of protein and is naturally low in carbohydrates, making it a staple for Keto and Mediterranean lifestyles.
Dietary Swaps: For a vegan alternative, use this same searing technique on thick "steaks" of cauliflower or lion's mane mushrooms. If you are Gluten Free, you are already in the clear as this recipe relies on pure proteins and fats.
The Fix-It:
- The Stick: If the fish is stuck, it is not ready to flip. Wait another sixty seconds for the crust to fully form and it will release itself.
- The White Gunk: This is albumin, a protein that pushes out when the fish is cooked too fast or too long. Lower your heat slightly next time.
- Soggy Skin: You likely crowded the pan. Cook in batches to ensure steam can escape.
Meal Prep: To reheat without losing that "day one" quality, avoid the microwave. Use a toaster oven at 300 degrees Fahrenheit or gently warm it in a covered pan with a teaspoon of water to create a steam chamber that restores moisture without overcooking the core.
The Wrap-Up
Mastering easy pan seared salmon recipes is the ultimate bridge between "I am too tired to cook" and "I am a culinary genius." By respecting the science of the sear and the importance of the rest, you transform a simple fillet into a restaurant caliber masterpiece. Remember: dry the skin, heat the pan, and trust the process. You have the tools and the technique; now go make some magic in that skillet.
The Kitchen Table
How do I know when the salmon is done?
The most reliable method is using a digital thermometer to hit 125 to 130 degrees Fahrenheit. Visually, the flesh should be opaque on the outside but still slightly translucent in the very center when flaked with a fork.
Why is my salmon skin not crispy?
The skin was likely too wet when it hit the oil, or your pan temperature was too low. Ensure you pat the fish extremely dry and wait for the oil to shimmer before adding the protein to the skillet.
Can I use frozen salmon for searing?
Yes, but it must be completely thawed and thoroughly dried. Frozen fish often releases more moisture, so double down on the paper towel ritual to ensure the surface is bone dry before it touches the hot fat.
What is the best pan for searing fish?
A heavy cast iron or stainless steel skillet is best. These materials retain heat more effectively than thin non stick pans, which allows for a more consistent and professional Maillard reaction on the skin of the fish.