
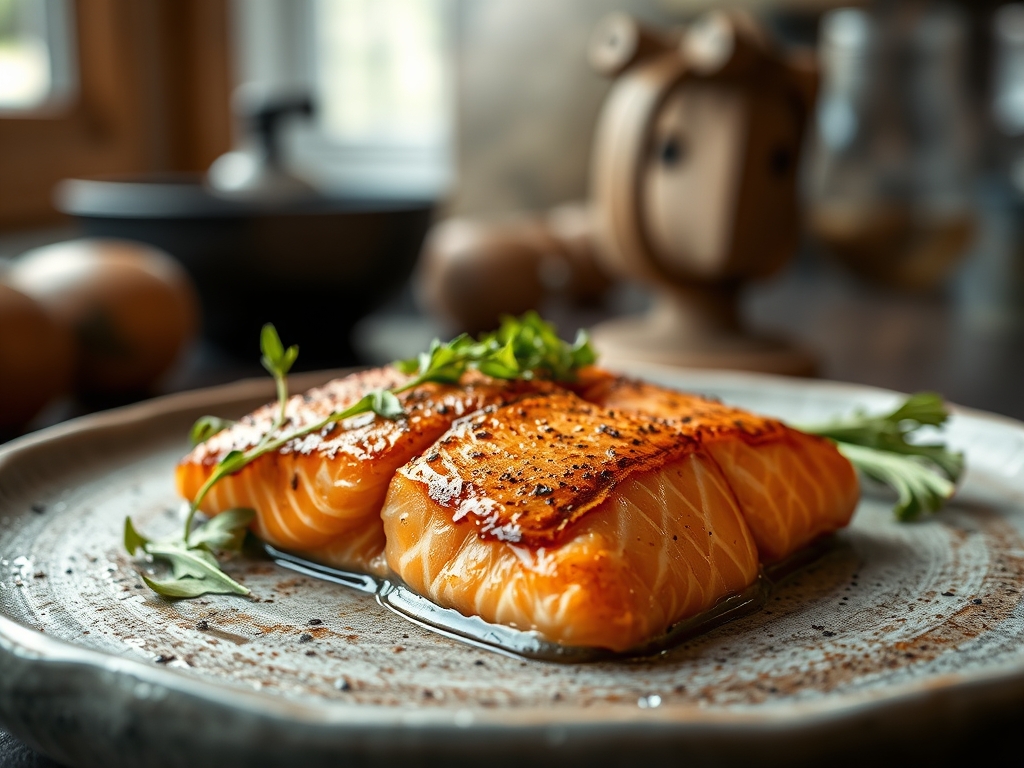
Imagine the scent of alder wood drifting through a crisp mountain morning while a tray of ruby-red fillets glistens under a sticky, amber glaze. Mastering smoked kokanee salmon recipes is less about following a rigid manual and more about understanding the delicate chemistry of landlocked sockeye. These fish are smaller, leaner, and more concentrated in flavor than their saltwater cousins; they require a gentle hand to prevent them from drying out into fish jerky. We are aiming for a texture that is buttery, flaky, and deeply infused with a balanced smoke profile. This is not just a snack; it is a culinary trophy that celebrates the patience of the angler and the precision of the chef.
The secret to a perfect roast lies in the interaction between the salt-sugar cure and the low-intensity heat of your smoker. By focusing on moisture retention and the development of the pellicle, we can transform a simple catch into a gourmet centerpiece. Whether you are serving this on a charcuterie board with whipped chèvre or flaking it into a creamy pasta, the depth of flavor is unmatched. Let us dive into the technical nuances that separate a hobbyist smoke from a professional-grade masterpiece.
The Gathers:
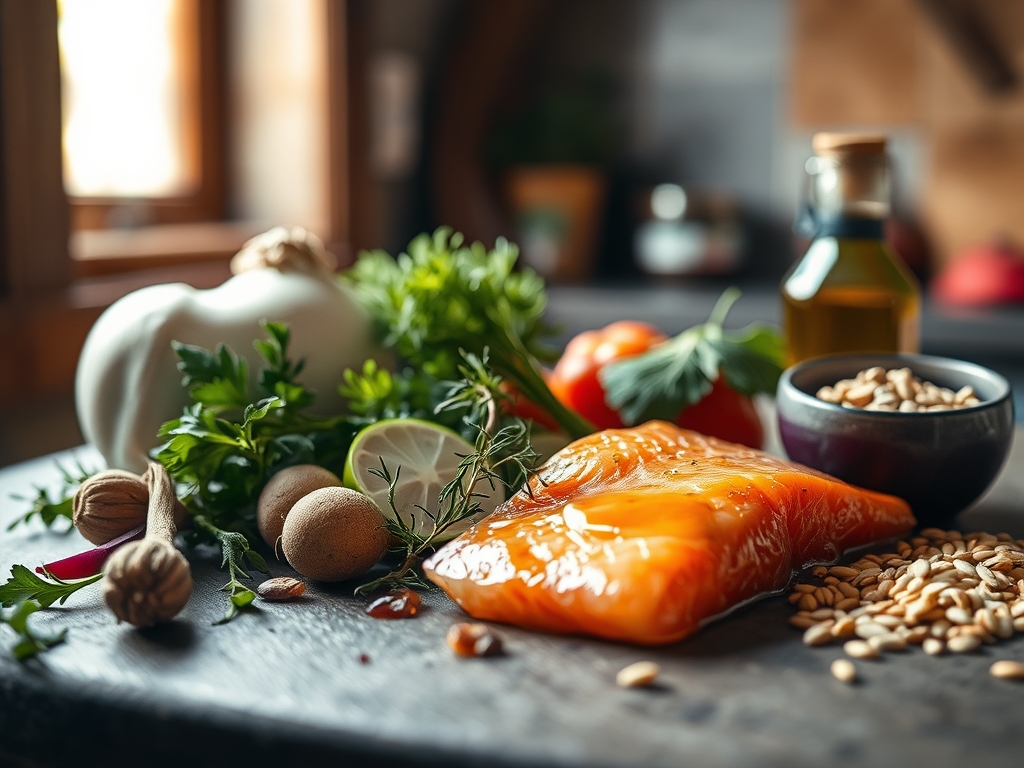
To begin, you must assemble your mise-en-place with the precision of a laboratory technician. Start with 4 to 6 fresh kokanee fillets, ensuring they are scaled and pin-boned using a pair of specialized fish tweezers. For the dry brine, you will need 1 cup of dark brown sugar for its hygroscopic properties and 1/2 cup of non-iodized sea salt. Use a digital scale to ensure your ratios are exact; salt density varies wildly between brands.
You will also need 1 tablespoon of cracked black peppercorns, 2 teaspoons of garlic powder, and a hint of lemon zest to provide a piquant counterpoint to the richness of the fat. For the glaze, gather 1/4 cup of pure maple syrup and a splash of bourbon. If you need smart substitutions, replace the brown sugar with coconut sugar for a lower glycemic index, or use smoked paprika if you are forced to use an electric oven instead of a traditional wood-fired smoker. Ensure your heavy-bottomed skillet is ready if you plan to reduce the glaze into a viscous syrup before application.
The Clock
Efficiency in the kitchen is all about the "Chef's Flow." Your active prep time is approximately 30 minutes, which includes cleaning the fish and mixing the brine. However, the passive time is where the magic happens. The fish must cure for at least 4 to 6 hours to allow the salt to denature the proteins and draw out excess moisture.
Following the cure, a 2-hour air-drying phase is non-negotiable for pellicle formation. The actual smoking process takes between 2 to 3 hours depending on the thickness of the fillets and your target internal temperature. Total time investment is roughly 10 hours. Plan to start the process the night before or very early in the morning to ensure you are not rushing the thermal transition.

The Masterclass
1. The Precision Brine
Coat the fillets evenly in your salt and sugar mixture. Use a bench scraper to move the fillets into a non-reactive glass dish without tearing the delicate flesh. Cover and refrigerate.
Pro Tip: The salt works through osmosis, drawing moisture out and then pulling the seasoned brine back into the muscle fibers. This seasons the fish to the bone and alters the protein structure to retain succulence during the roast.
2. The Pellicle Development
Rinse the fillets under cold water to remove excess salt and pat them bone-dry with lint-free towels. Place them on a wire cooling rack over a sheet pan and set them in a cool, breezy spot or under a ceiling fan for two hours.
Pro Tip: This creates the pellicle, a tacky outer skin. Without this layer, the smoke cannot effectively adhere to the fish, and the fats will leak out, resulting in a dull, grey appearance rather than a glossy finish.
3. Loading the Smoker
Preheat your smoker to 150 degrees Fahrenheit using fruitwood like apple or cherry. Place the fillets on the grates, ensuring they do not touch to allow for maximum airflow and convection.
Pro Tip: Starting at a low temperature prevents albumin (that white, unappealing protein) from squeezing out of the muscle fibers. Gradual heating keeps the proteins relaxed.
4. The Glaze Infusion
When the internal temperature reaches 110 degrees Fahrenheit, use a silicone pastry brush to apply your maple-bourbon glaze. This adds a layer of complex sugars that will eventually undergo the Maillard reaction.
Pro Tip: The sugars in the glaze create a barrier that slows down evaporation. This allows the smoke to infuse deeper into the meat while keeping the interior moist.
5. The Final Pull
Monitor the internal temperature with a high-quality digital probe. Pull the fish when it hits 135 to 140 degrees Fahrenheit. The temperature will continue to rise slightly after removal.
Pro Tip: This is known as thermal carryover. If you wait until 145 degrees to pull the fish, the residual heat will push it into "overcooked" territory, making the lean kokanee brittle.
6. The Rest and Set
Allow the salmon to rest on a room-temperature surface for at least 20 minutes before serving or vacuum sealing.
Pro Tip: Resting allows the remaining moisture to redistribute through the fillet. If you cut into it immediately, the pressurized juices will escape, leaving the fish dry.
The Deep Dive
From a macro perspective, smoked kokanee is a nutritional powerhouse. It is exceptionally high in Omega-3 fatty acids and Vitamin D, with roughly 25 grams of protein per 4-ounce serving. For those following a Keto lifestyle, simply swap the maple syrup and brown sugar for an allulose-based sweetener. For a Vegan alternative, this same smoking technique can be applied to thin slices of marinated king oyster mushrooms or firm tofu.
If you encounter pitfalls, do not panic. If the fish is too salty, you likely left it in the brine too long; fix this by soaking the finished product in a bit of milk for 10 minutes to draw out the salt. If the skin is rubbery, it means the heat was too low at the very end; a quick 30-second flash under a broiler can crisp it up. For meal prep, reheat the salmon by placing it in a covered dish with a teaspoon of water at 250 degrees Fahrenheit. This creates a small amount of steam to rehydrate the proteins without overcooking them.
The Wrap-Up
You are now equipped with the scientific secrets to turn a humble lake fish into a world-class delicacy. Remember that great smoked kokanee is a marriage of patience and physics. By controlling the moisture through a proper cure and respecting the delicate nature of the proteins during the roast, you ensure a result that is smoky, sweet, and incredibly tender. Grab your tongs, fire up the smoker, and get ready to impress everyone at the table with your technical prowess.
The Kitchen Table
How long does smoked kokanee salmon last in the fridge?
When stored in an airtight container or vacuum-sealed bag, smoked kokanee will remain fresh for up to 10 days. For longer storage, freeze the vacuum-sealed fillets for up to six months without compromising texture or flavor.
What is the best wood for smoking kokanee?
Fruitwoods like apple, cherry, or peach are ideal because they offer a mild, sweet smoke profile. Avoid heavy woods like hickory or mesquite, which can easily overwhelm the delicate, lean flavor of landlocked salmon.
Why is my smoked salmon dry?
Dryness usually results from skipping the pellicle drying phase or overcooking the fish. Ensure you pull the salmon at an internal temperature of 135 to 140 degrees Fahrenheit to account for thermal carryover during the resting period.
Do I need to leave the skin on?
Yes, always smoke kokanee with the skin on. The skin acts as a protective thermal barrier against the heat source and helps hold the delicate oils within the flesh, ensuring a much moister end result.